
Disclosure: *This post may include affiliate links. As an affiliate, I earn from qualifying purchases.
Read the disclosures and terms for more information.
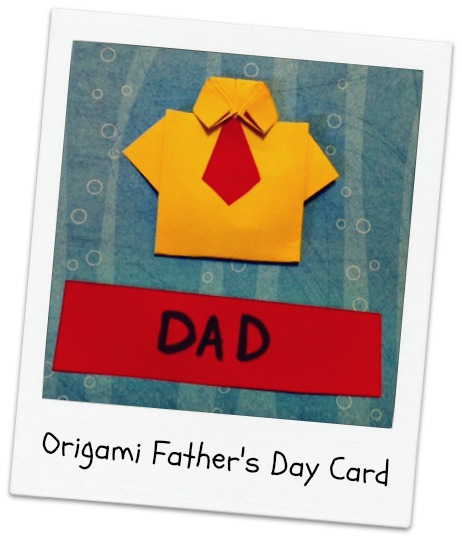
Today was art day and we made these cute Father’s Day cards. Since the kids and I also happen to be doing a mini Japan unit, we decided to try out origami.
I found a tutorial for making the origami shirts here and cut out the shirt papers, ties, and other pieces ahead of time.
Here’s how to make a Origami Father’s Day Card shirt:
 |
| Start with a piece of 4×6 paper |
|
| Fold edges to center |
|
| Fold the top half inch down |
|
| Fold another half inch but toward the opposite side |
|
| Fold the top corners in until they just touch |
|
| Fold the bottom up and tuck it under the shirt collar |
|
Open it back up and fold back the lower corners
using the middle fold mark as a guide. |
|
| Fold the bottom back up and tuck in. A shirt! 🙂 |
|
| Add a tie. Of course. |
 |
| So cute! |
The kids helped as much as they could and glued the tie on. It turned out pretty well! The kids decorated and wrote on the inside.
Since the kids had a hard time folding, we also did this quick ladybug origami because it was a bit easier for their little hands. Find the directions for folding here.
Origami seems to be a fun and simple craft for the kids and I think we’ll try more in the future!


These are cute, Tauna—thanks! Elisha, especially, loves to do paper folding so I’ll show him this post! 🙂
This morning, my daughter and I searched for the same instructions and made 3 different shirts and ties.
How funny!